练习2-编译调试Nginx
前置内容:练习1-编译调试teamTalk,cmake入门笔记,对 makefile 有一定了解。
参考:nginx依赖库,Windows下编译Nginx,gdb远程调试,《深入剖析Nginx》,chatgpt 。
前言
Nginx 是一款高性能的开源Web服务器和反向代理服务器,其特点是占用内存少、并发能力强、处理静态文件快、可扩展性好、稳定性高、配置简单等。毫无疑问,花时间学习它将是一笔划算的投资,那么第一步便是编译、运行并调试它。本文给出以下几种途径来编译调试 Nginx:
- 原生 gdb 调试
- CLion 编译数据库组织项目 + 远程 gdb 调试
- CLion 原生支持 CMake 管理项目并调试
- (转载)VS 编译调试 Nginx
在上节练习1-编译调试teamTalk中,我们熟悉了 Windows 的 Visual Studio 开发环境,本节我们则重点讲述 Linux 下的 CLion 开发环境,本机 Linux 环境为 Ubuntu 20.4.6 。
原生 gdb 调试
此方式直接对包含调试信息的可执行程序 nginx 进行 gdb 调试,这种方式当然是最简单的,也当然是最痛苦的,没人希望在黑洞洞的狭窄界面中调试跟踪几万行的大型项目。下面先说明如何编译并配置 Nginx,此内容也是后续方法的前提步骤 。
1.安装依赖库
-
pcre 库,以支持正则表达式。如果我们在配置文件 nginx.conf 中使用了正则表达式,那么必须链接此库。
1
sudo apt-get install libpcre3 libpcre3-dev
-
zlib 库,用于对 HTTP 包的内容做 gzip 格式的压缩。
1
sudo apt-get install zlib1g-dev
-
OpenSSL 库,用于支持 SSL 协议。
1
sudo apt-get install openssl libssl-dev
2.安装 Nginx
-
在官方下载源码,考虑到《深入剖析Nginx》这本书采用的是 1.2.0 版本进行讲解,为了方便后续对照学习,笔者也下载的此版本。
-
在你喜欢的地方解压并进入该目录,使用以下配置生成 makefile:
1
./configure --with-debug --prefix="/home/jyx/CLionProjects/nginx" --with-cc-opt="-Wno-error"
--with-debug:添加调试信息,这是我们后续调试的前提!--prefix="/home/jyx/CLionProjects/nginx":1)指定安装目录,如果不指定,则默认安装在usr/local/nginx下。2)每次启动 nginx 时,程序会首先从该位置的 conf 目录下读取 nginx.conf 配置文件。
为了方便后续统一在 CLion 下编辑整个项目,我们不打算 make install,所以将路径设置为该目录本身,这样读取配置时就直接从该目录下的 conf 目录读取配置文件。注意,不能有中文路径!--with-cc-opt="-Wno-error":指定编译选项以忽略下面的错误:

输入
./configure --help以查看其他选项。 -
执行 make ,你可能会遇到报错:

这是版本问题,不用慌,注释掉这行代码即可 。 -
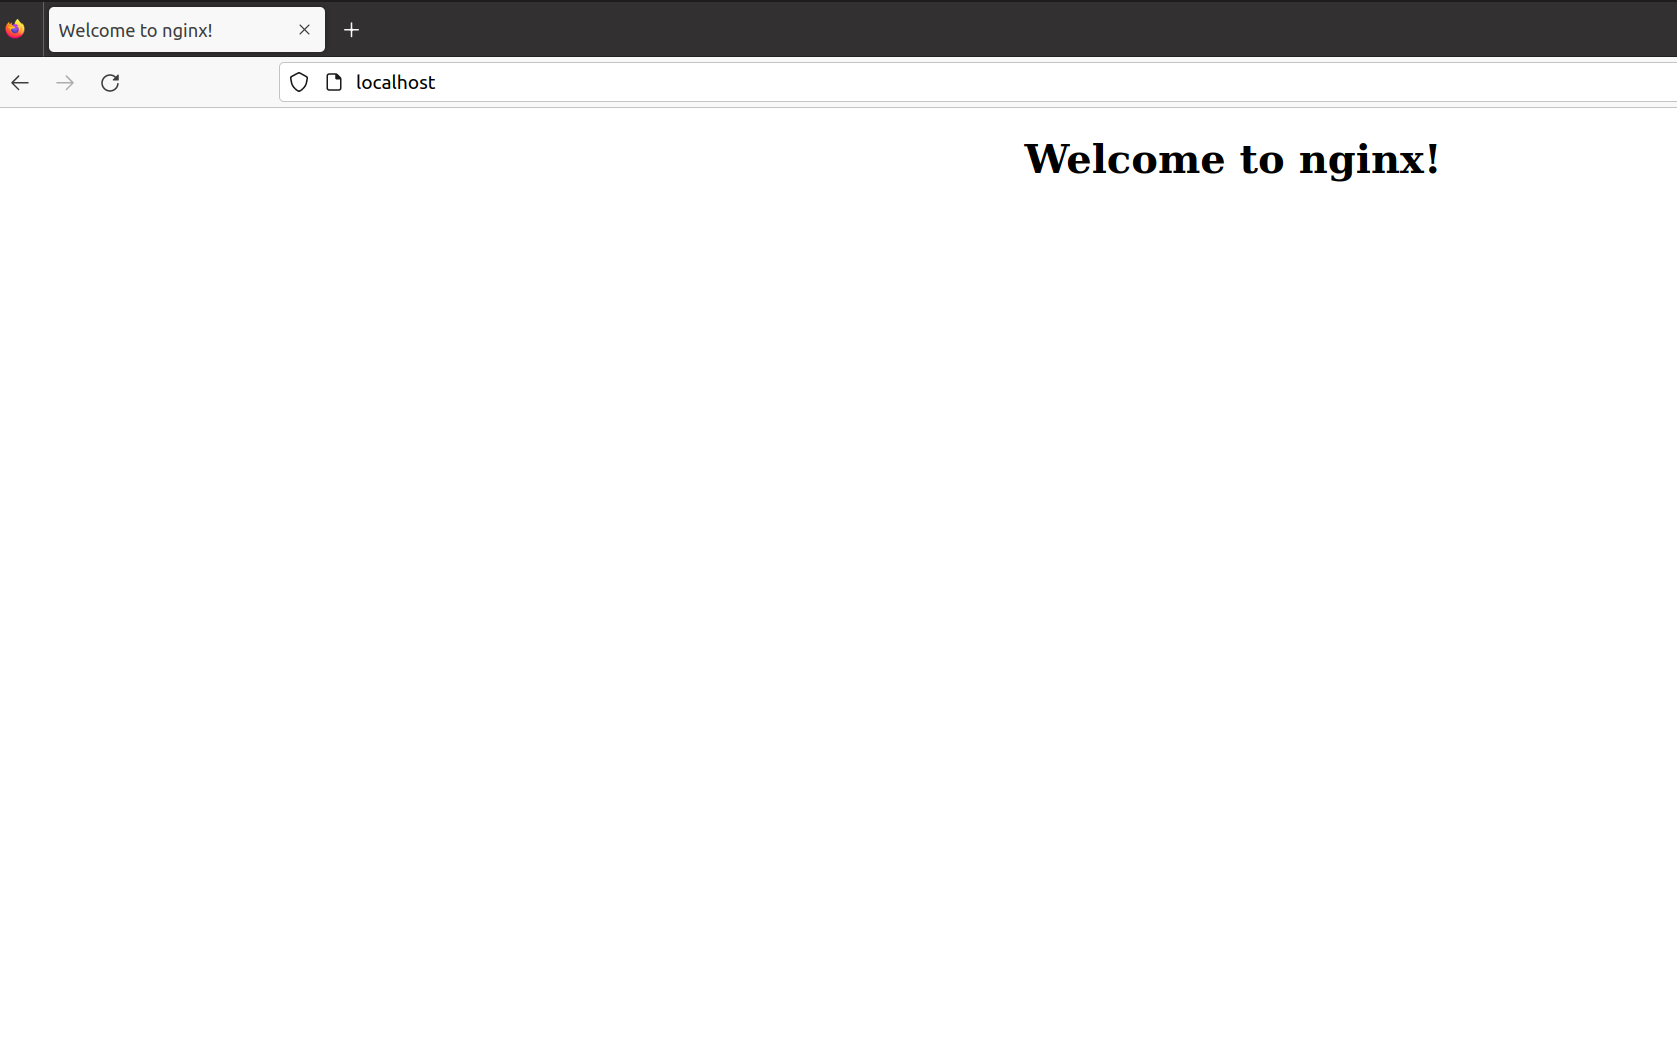
使用 sudo 权限运行 objs/nginx,报错:

小问题,我们在 nginx 目录下创建 logs 目录即可,重新运行,成功:
1
2
3
4
5
$ sudo ps -aux | grep nginx
jyx 1916 0.0 0.1 175184 8988 ? Sl May18 0:00 /usr/libexec/ibus-engine-simple
root 15773 0.0 0.0 7324 1184 ? Ss 00:38 0:00 nginx: master process /home/jyx/Downloads/nginx-1.2.0/objs/nginx
nobody 15774 0.0 0.0 7960 3104 ? S 00:38 0:00 nginx: worker process
jyx 18578 0.0 0.0 17672 720 pts/1 S+ 02:01 0:00 grep --color=auto ngi可见 Nginx 开启了多个进程。注意,nginx 以后台方式运行,后续重启调试 nginx 时需要先关闭所有相关进程,否则会提示 bind 函数调用失败。关闭方法如下:
1
$ sudo killall nginx
3.调试 nginx
在默认情况下, Nginx 会有多个进程,即一个主进程和多个工作进程(由 nginx.conf 决定)。如果要调试 Nginx 对客户端发过来请求的处理过程, 那么要注意请求是否被交付给另外一个工作进程处理而导致绑定到 gdb 的这个工作进程实际没有动作,为了方便,我们直接指定工作进程的数量为 1 :
1 | #nginx.conf文件 |
同时,Nginx 默认以 daemon 形式运行, 即它会调用 fork 创建子进程并且把父进程直接 exit(0)丢弃, 而 gdb 默认将跟踪 fork() 之后的父进程, 这将导致跟踪丢失:

所以我们关闭 daemon 模式:
1 | #nginx.conf文件 |
这样设置后,我们调试的是监控进程(master)的流程。工作进程(worker)由 master 进程 fork 而来,如果要调试 worker 进程,则需要在进入 gdb 后执行如下命令:
1 | set follow-fbrk-mode child |
也就是让 gdb 跟踪 fork 之后的子进程。如果我们想要同时跟踪 master 和 worker,则直接将它们合并到一个进程中 ,配置如下:
1 | #nginx.conf文件 |
这样,我们就将监控进程逻辑和工作进程逻辑全部合在了一个进程里。通过这三处配置,调试难度就大大降低了。
接下来我们使用 gdb 调试 objs 目录下的 nginx 程序即可,注意使用 sudo 运行 :
接下来就开始你的调试之路吧。
CLion 编译数据库+gdb远程调试
Nginx 使用 makefile 来构建项目,而 CLion 本身使用 cmake 来组织管理项目,对 makefile 的支持还不够到位,因此无法直接接管 Nginx 项目。所幸的是,CLion 支持编译数据库(compile_commands.json),我们能够通过它来组织管理项目。读者朋友们可能不太熟悉编译数据库,下面是 chatgpt 对它的简单介绍:
compile_commands.json 是一个 JSON 格式的文件,它包含了编译器生成的编译命令以及相关的源文件和编译选项。这个文件通常用于辅助代码分析工具,如代码编辑器、代码静态分析工具等,以便这些工具能够理解代码的编译过程,从而提供更好的代码提示、错误检查和重构等功能。
注意,它只能用来组织项目以便提供代码分析功能(比如代码跳转、代码提示等),其本身不是类似于 cmake 和 makefile 一类的构建文件,无法用来构建或生成项目 。
- 这里我们使用 compiledb 工具来生成 compile_commands.json,首先下载它:
1 | #通过pip安装compiledb |
- 如之前所述,仍然先生成 makefile:
1 | ./configure --with-debug --prefix="/home/jyx/CLionProjects/nginx" --with-cc-opt="-Wno-error" |
- 生成编译数据库 compile_commands.json :
1 | $ compiledb -nf make |
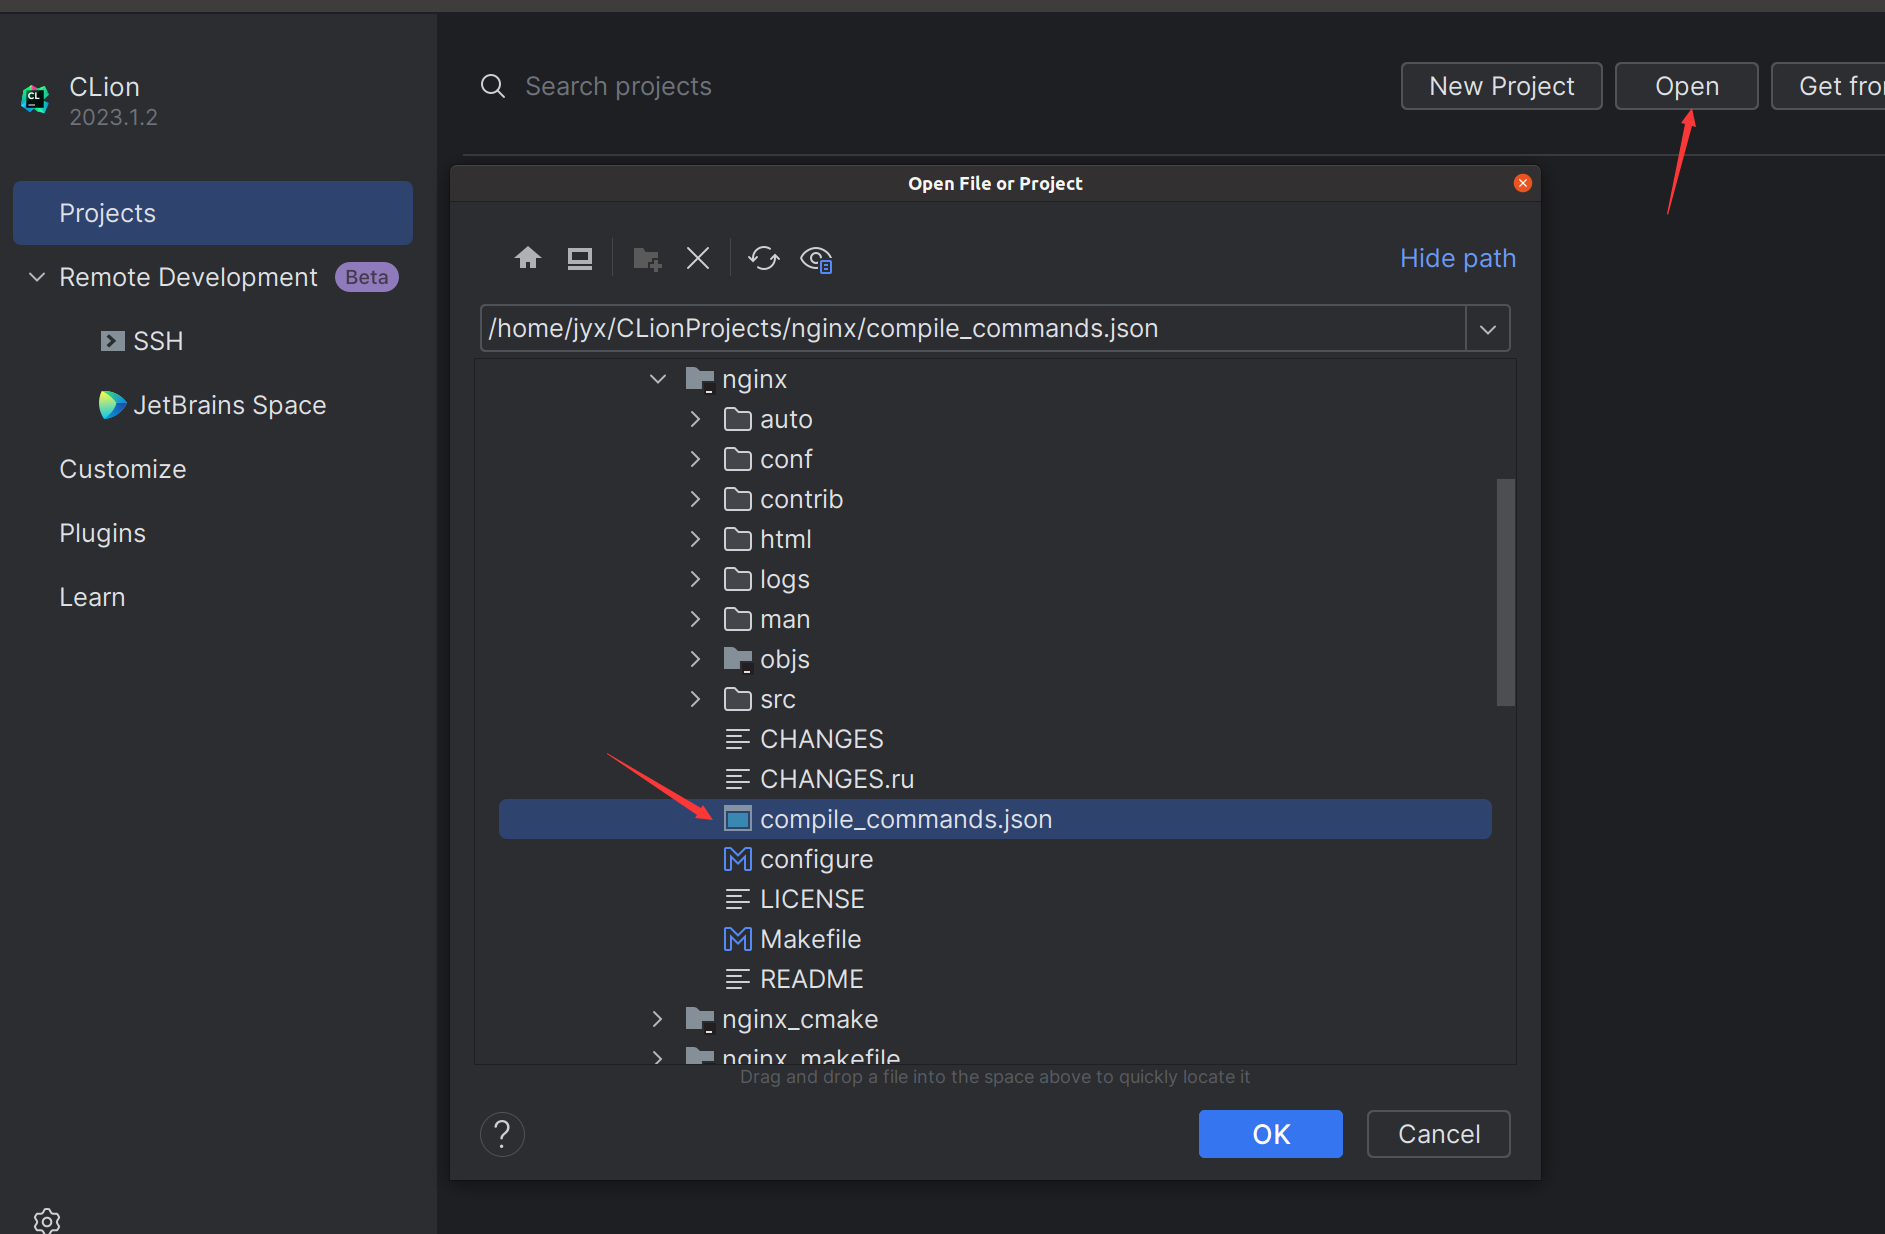
- 通过 CLion 打开该编译数据库,open as projecct :
这样我们就能利用 CLion 分析整个 Nginx 项目了。你可以试试点击头文件跳转的功能(CTRL+点击),如果不使用编译数据库,是无法跳转的(除非该头文件和目前文件在同一目录)。
此时我们仅获得了代码分析功能,还无法调试该项目,还需要借助 gdb 的远程调试功能。我们先使用 make 编译该项目生成 objs/nginx 可执行文件,然后开启 gdbserver:

然后回到 CLion 添加配置选项:
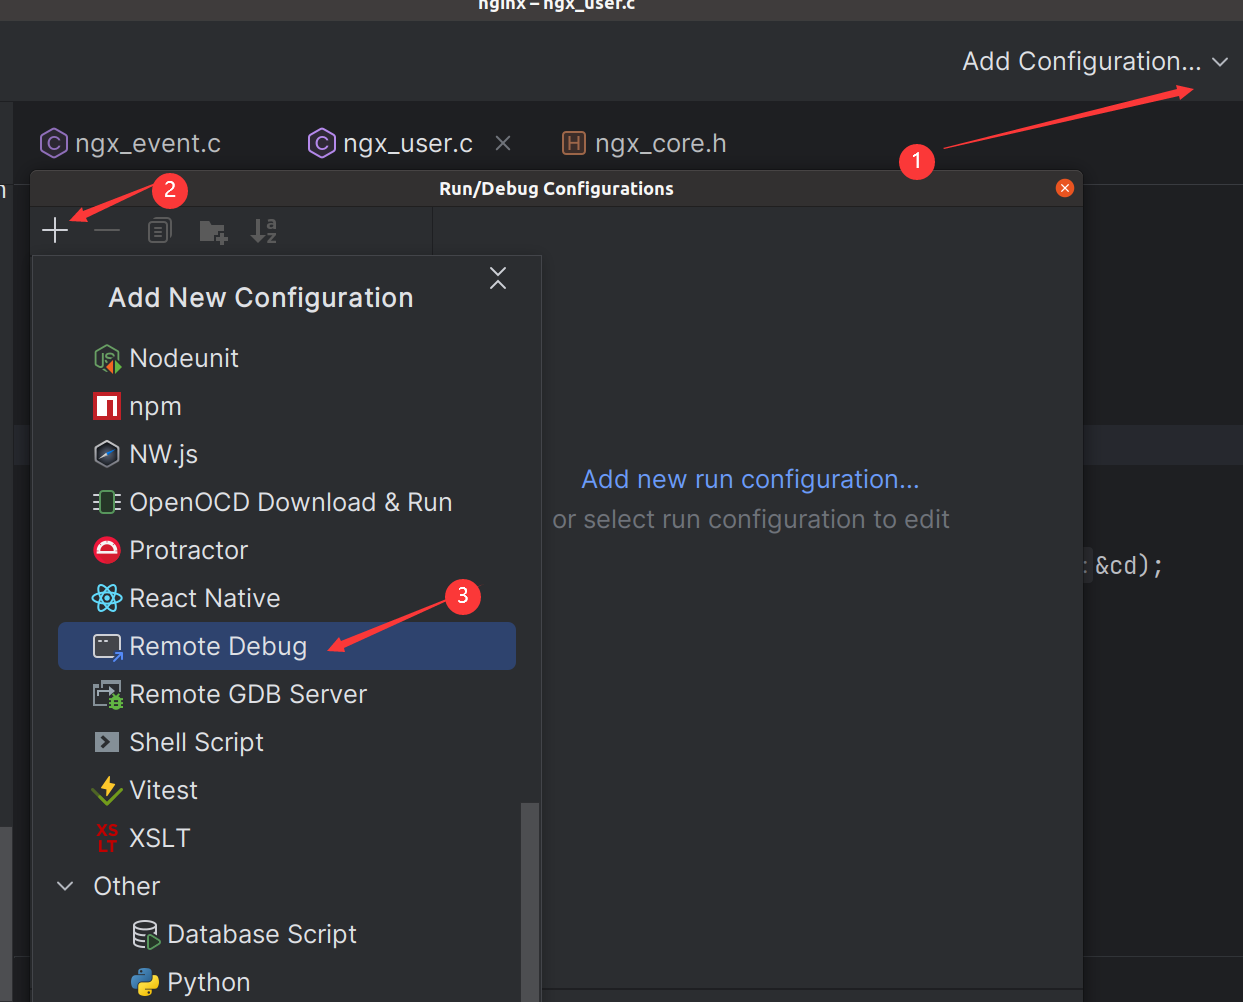

点击 OK,接下来见证奇迹,点击右上方的 debug 虫子图标,开始调试:
程序在断点处停了下来,调试成功。另外,如果我们想让程序中断下来,则需要在 gdbserver 处执行 CTRL+C,在 CLion 中的 gdb 窗口执行 CTRL+C 将没有任何反应。
这里调试时依然别忘了我们之前的三处配置。
CLion + CMake 管理项目并调试
使用 gdb 远程调试总感觉有些别扭,而且中断程序时也不方便,所以下面我们尝试用 CLion 原生支持的 cmake 来管理项目。首先我们需要将 makefile 转换为 CMakeLists.txt ,这里有几点说明:
- cmake 比 makefile 更抽象,具备一些 makefile 没有的东西,所以不存在一种统一(或者说官方)的工具来将 makefile 转为 CMakeLists.txt 。
- 一般来说,采用 makefile 管理的项目中,其 makefile 都比较简单(不像 cmake 生成的 makefile,那可不是人看的),完全可以手动将其转换为 CMakeLists.txt 。
就 objs 目录下的 makefile 来说(执行 configure 后),其表达的功能就三个:
-
将指定源文件生成目标文件,如:
1
2
3
4$(CC) -c $(CFLAGS) $(CORE_INCS)
-o objs/src/core/nginx.o \
src/core/nginx.c
#nginx.c --> nginx.o -
将所有目标文件和库文件链接成可执行文件(第 208 行):
1
2$(LINK) -o objs/nginx 所有目标文件 \
-lpthread -lcrypt -lpcre -lcrypto -lcrypto -lz #链接库 -
至于第 1068 行之后的就不用管了,它们是用来处理文档和安装任务的。
所以转 CMakeLists.txt 是很轻松的,当然,前提是你需要有一定的 makefile 和 cmake 基础(头秃),下面给出笔者转换的 CMakeLists.txt :
1 | cmake_minimum_required(VERSION 3.16.3) |
是不是感觉太简洁了?没错,就是这么简单。将这个 txt 放在项目的根目录下。
接下来执行 configure,还是之前的选项(注意修改路径),然后进入 objs 目录,执行 cmake .. 生成 makefile,最后 make 生成可执行文件,一切顺利!
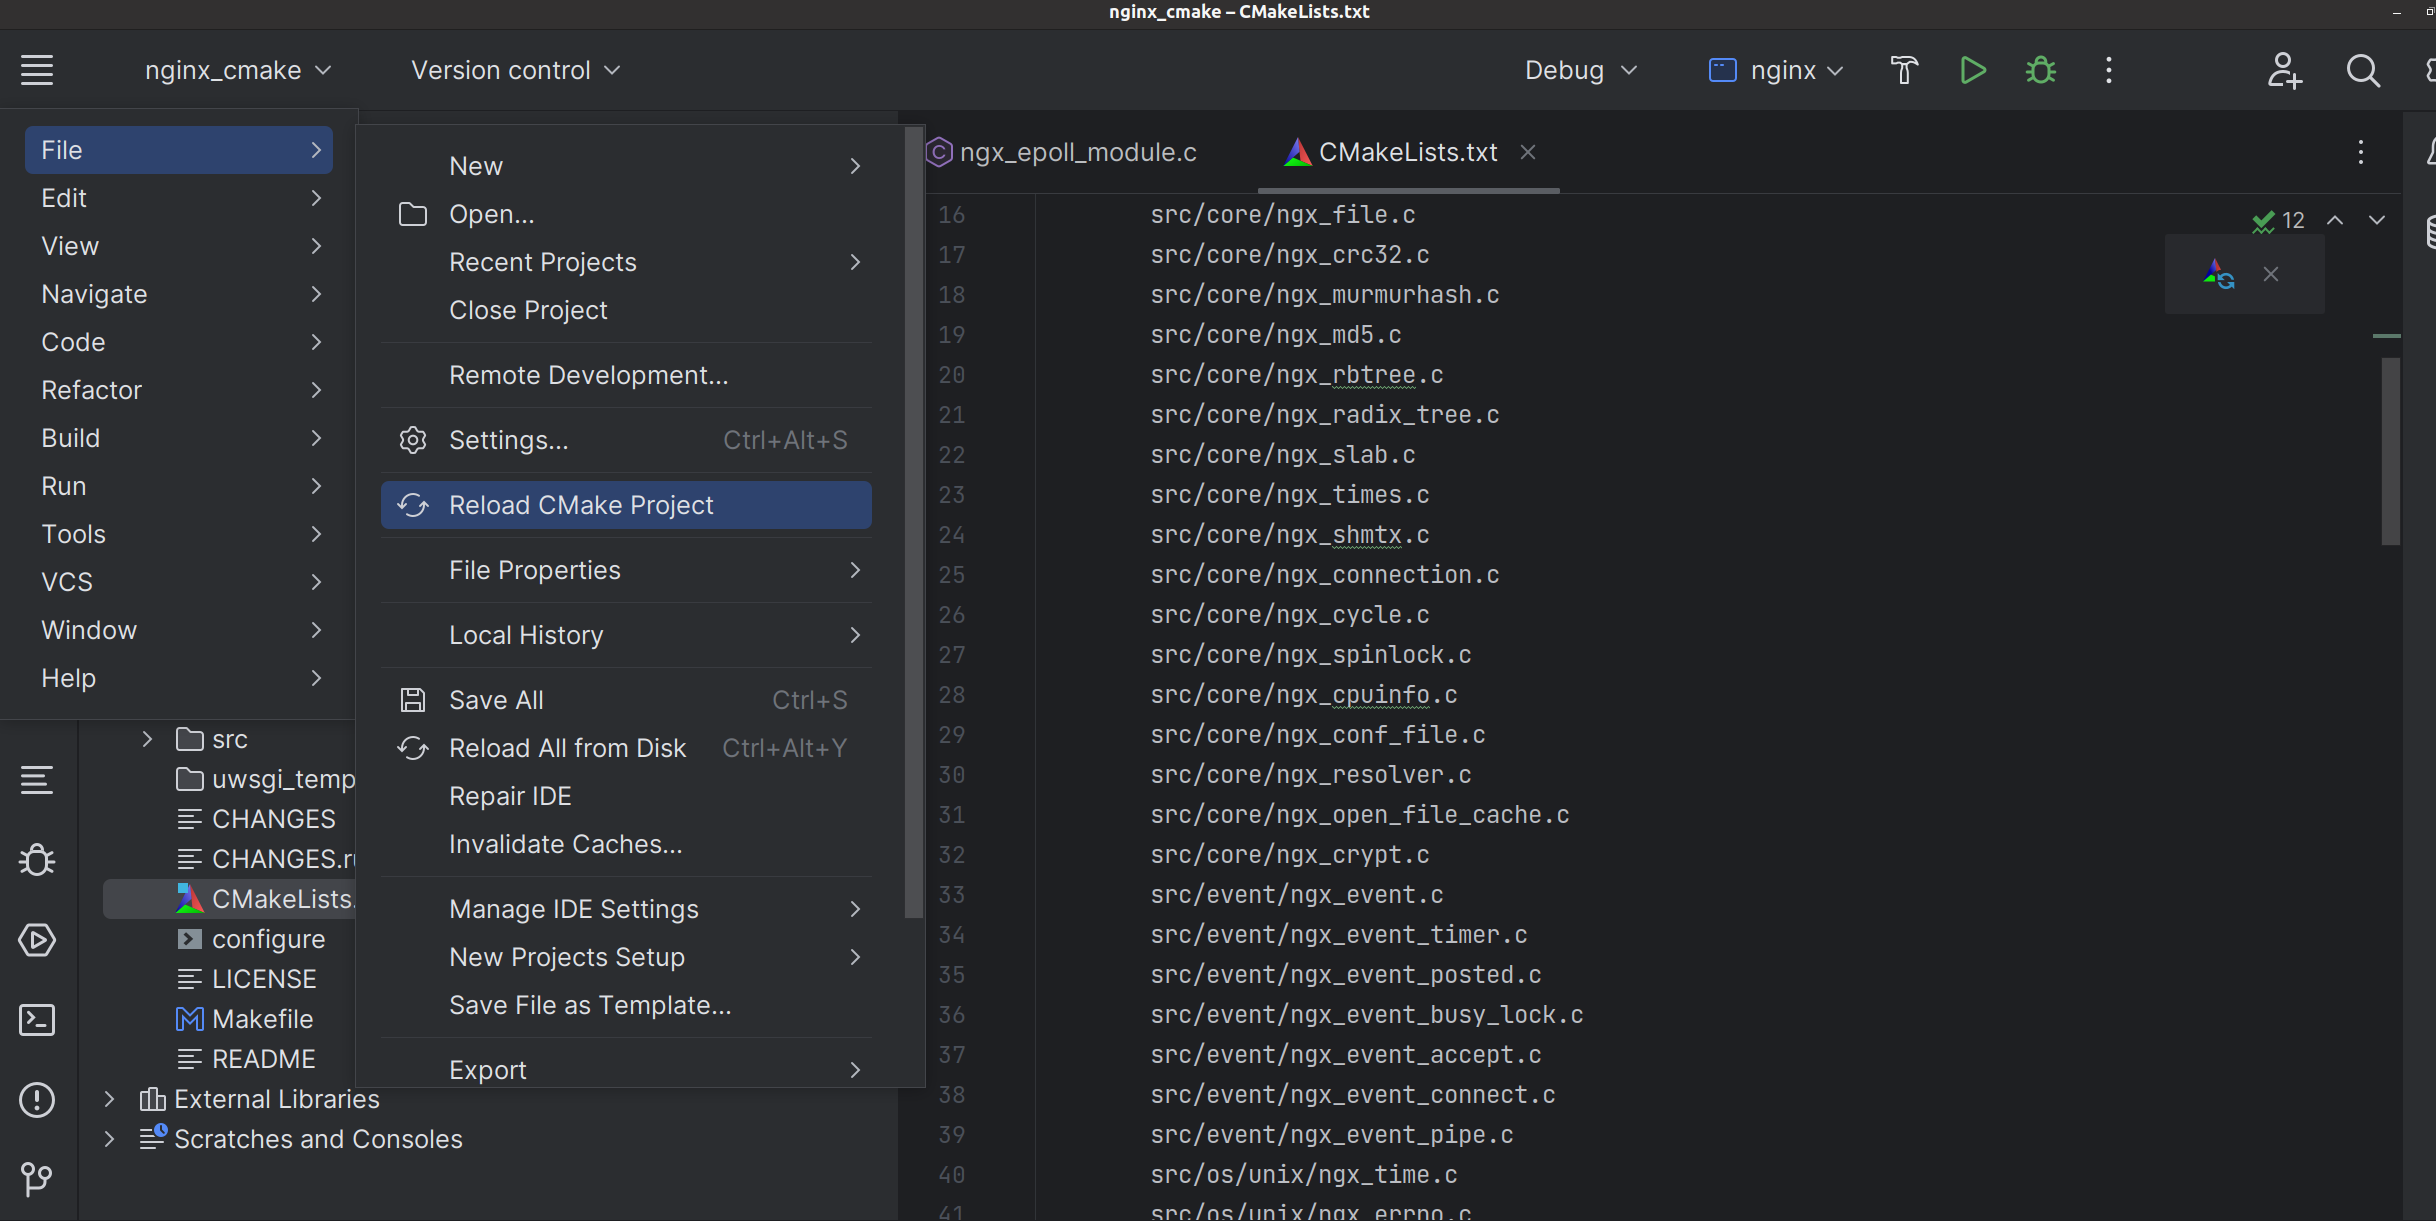
此时我们用 CLion 打开该项目(如果之前已经打开过,记得删除项目根目录下的 .idea 文件,避免项目缓存而检测不到 CMakeLists.txt),可以发现此时 CLion 就是使用 cmake 来管理项目的:
然后点击右上角的运行图标,报错如下:

这是提示权限不够,我们使用管理员权限来运行,修改步骤如下:
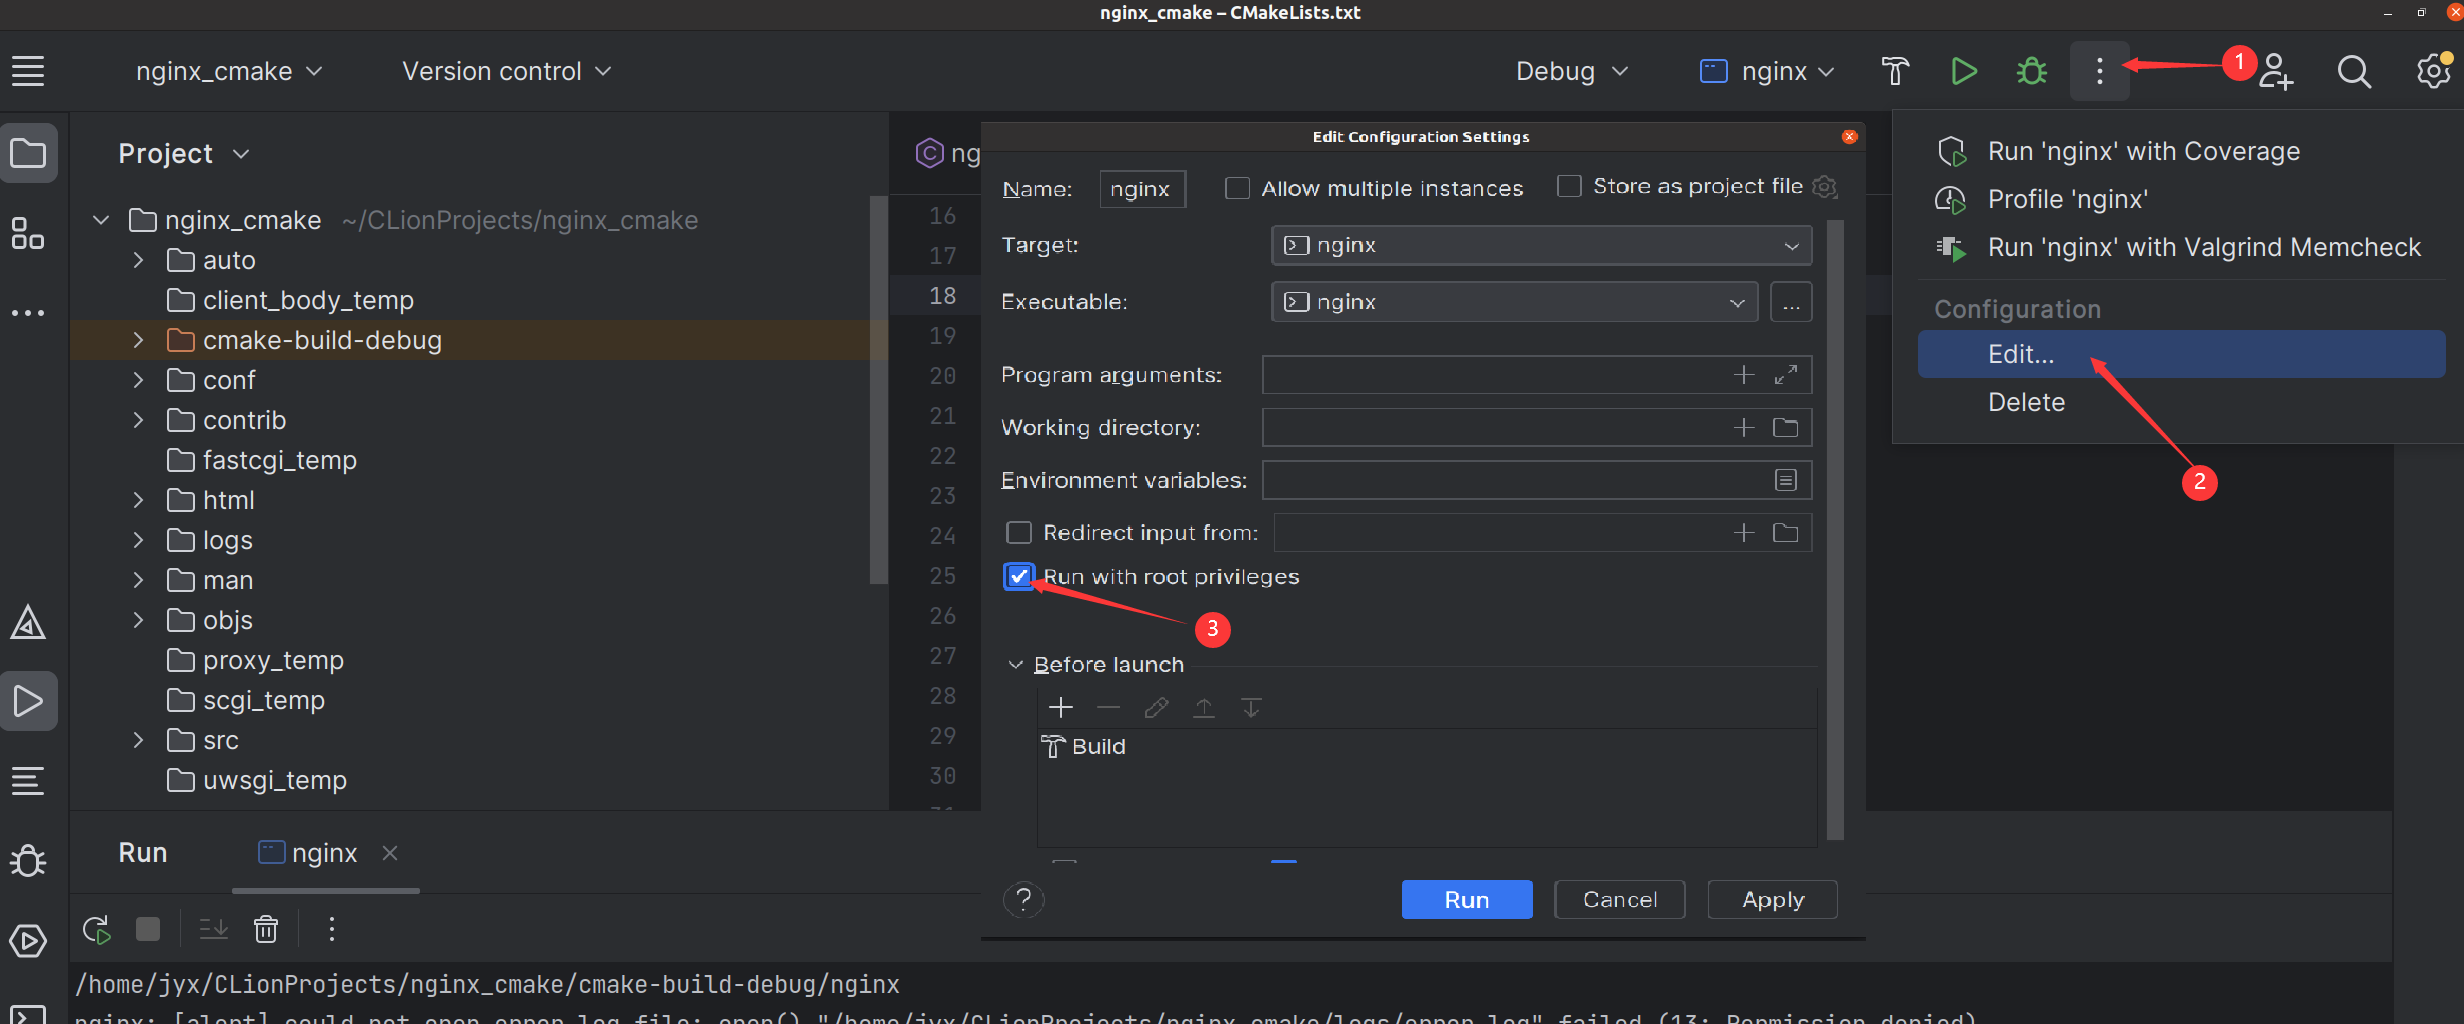
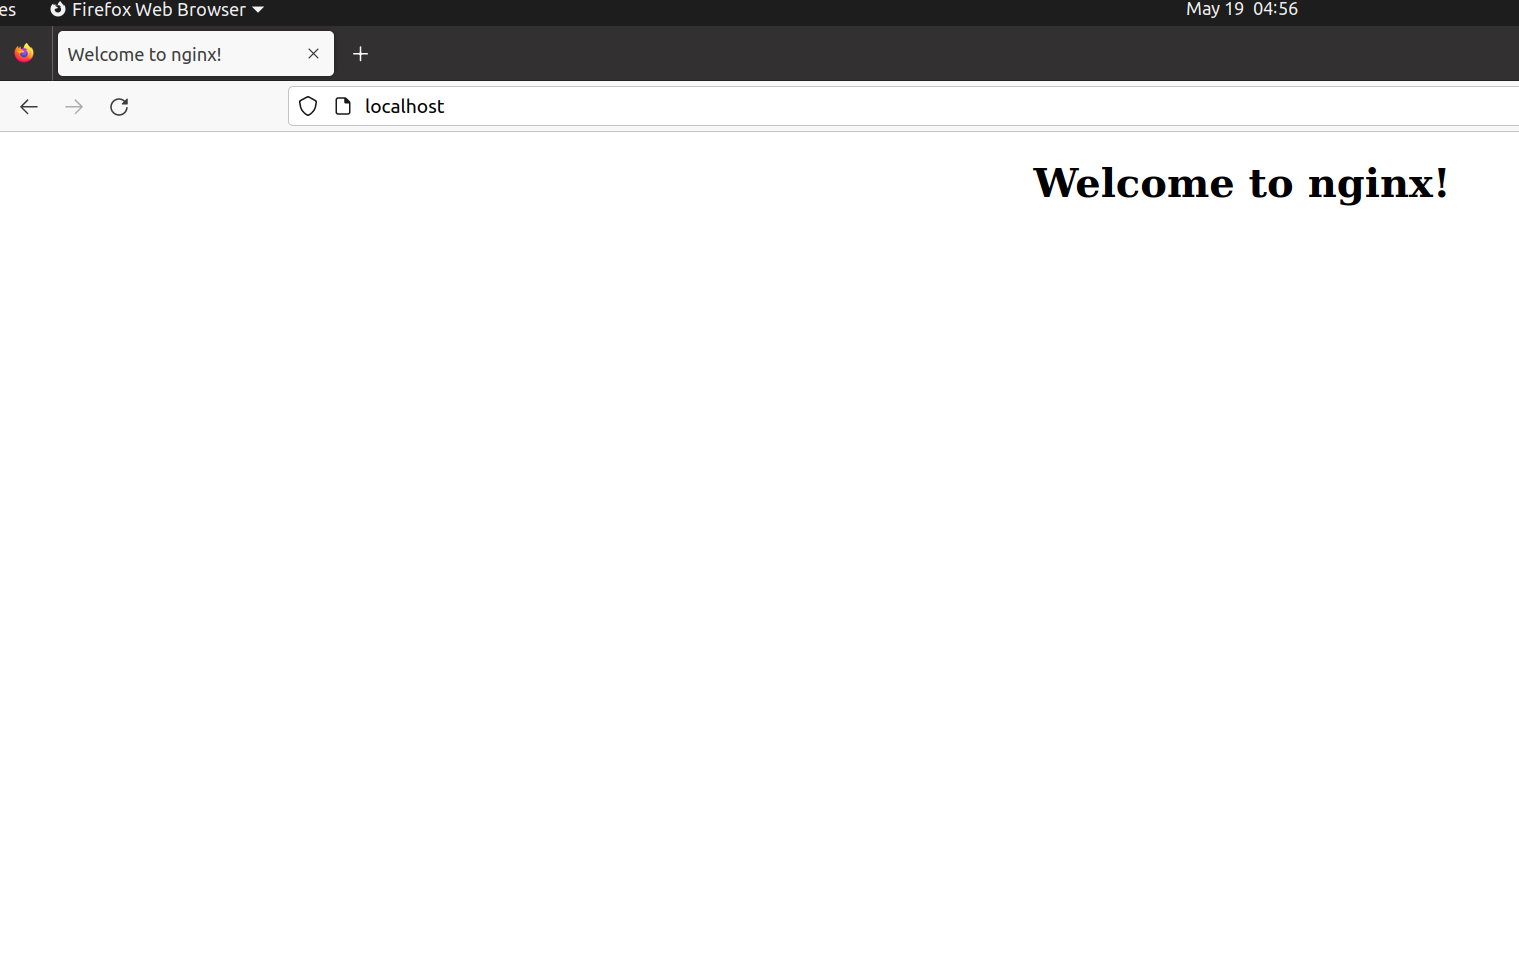
然后运行,成功!
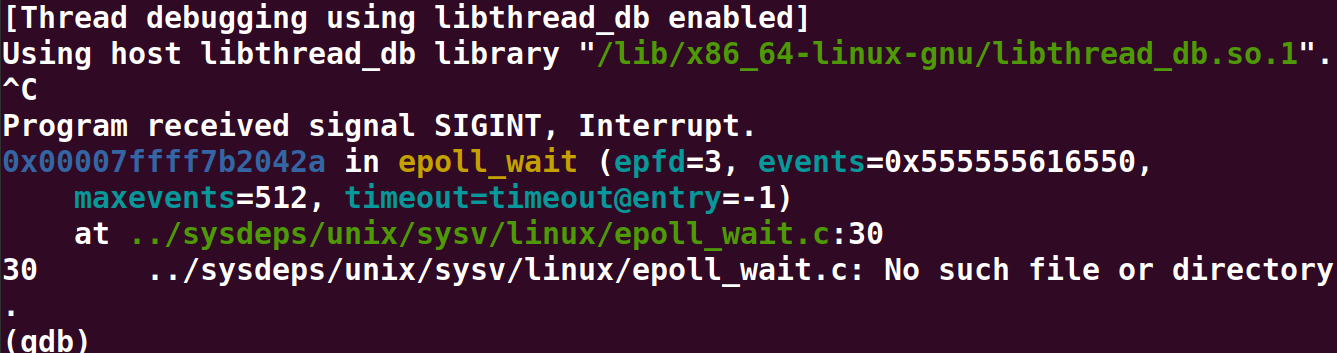
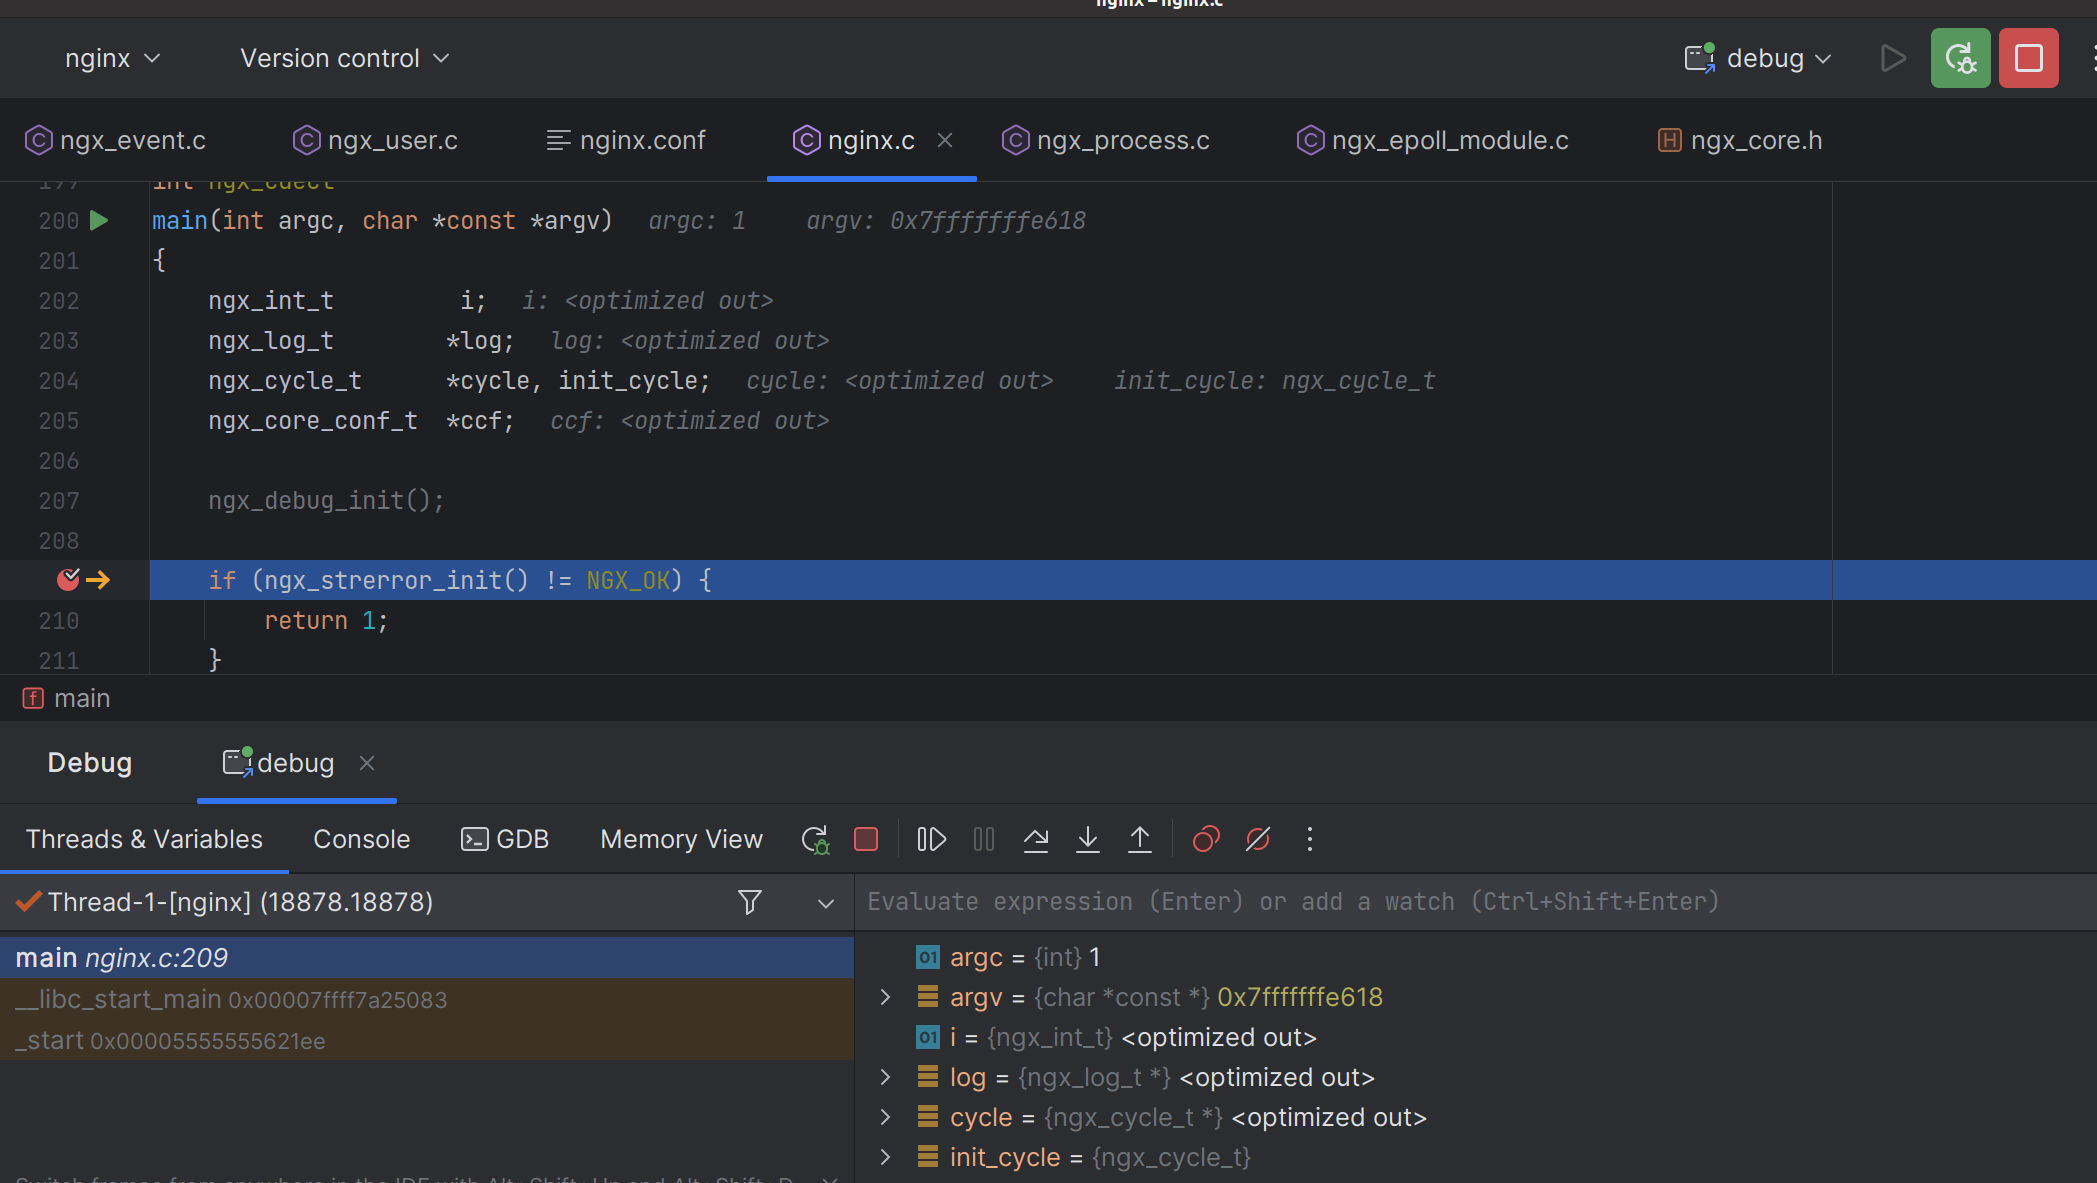
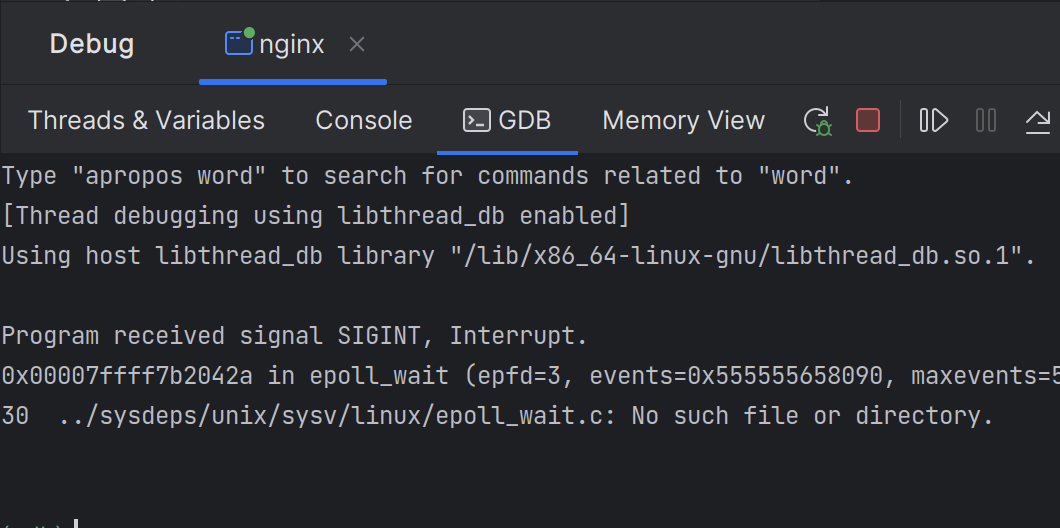
再试试调试,效果不错!
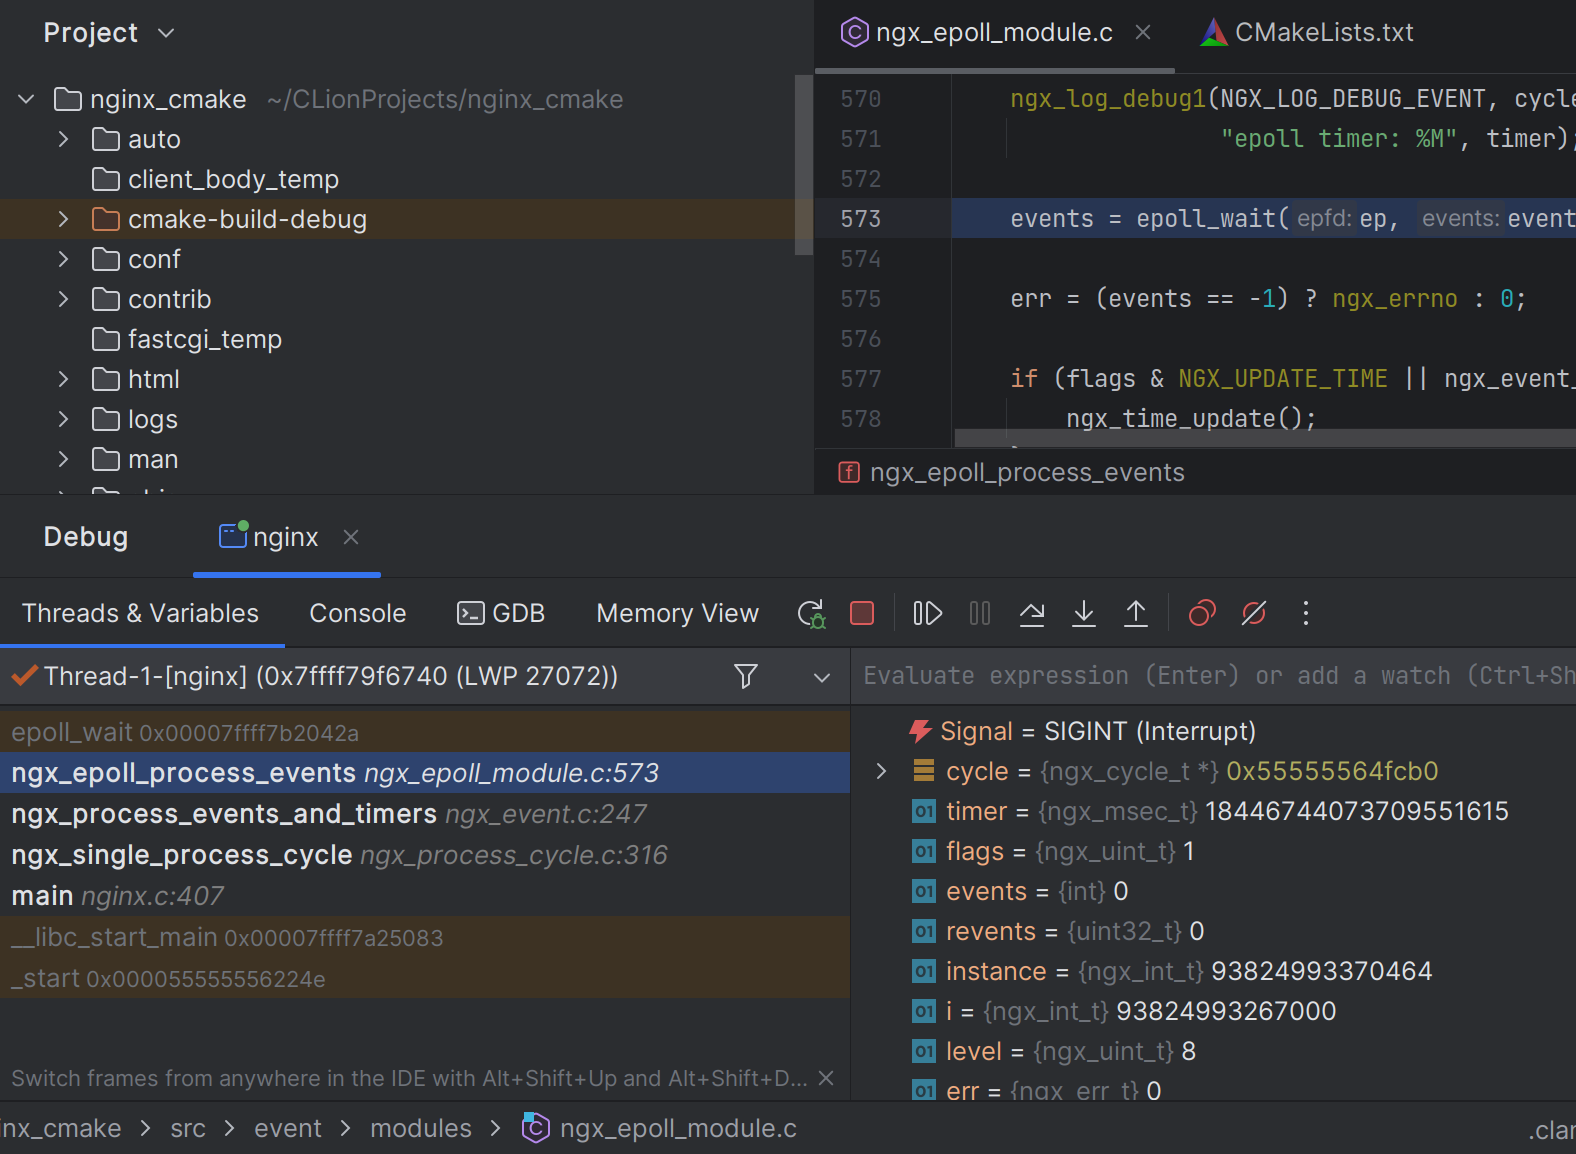
而且我们可以直接在 Console 中断程序来看目前执行流阻塞在哪,下图指出程序阻塞在 epoll_wait 中:
笔者认为这种方式是最优雅的方式,读者朋友喜欢哪一种呢?
VS调试Nginx
注意事项
有人发现 CLion 能够直接为外部导入的项目生成 CMakeLists.txt,如下:

自动创建 CMakeLists.txt 会将项目中的所有 .h 和 .c 文件都包含进来,这是不应该的! 我们应该根据执行 ./configure 后产生的 makefile 来按需引入 .c 和 .h 文件,即根据配置来引入,这是因为可能你明明指定了不需要某个功能,但却引入了相关的文件,这会在编译时产生大量报错,令人头疼不已!
总结
- 查看 README,了解项目功能、选项、依赖。
- 运行
./configure --help来查看编译选项。 - 项目编译出错时,看看配置是否对的上,比如你没有配置某个功能,却引入了相关的源文件。
- 一些莫名奇妙的问题多问问 google 。